
All guides
Flash firmware
Enter the bootloader, pick the right file, drag it to the drive or use QMK Toolbox; notes for QMK, ZMK, RMK and split keyboards.
Last updated 2026-10-15
You only need to flash when changing the default keymap or updating the firmware. Live remapping with VIA, Vial or ZMK Studio does not need it.
Step 1: enter the bootloader
Common methods — pick one that your keyboard's guide supports:
| Method | Typical for |
|---|---|
| Double-tap the reset button | nice!nano and other nRF52840 controllers (common on ZMK, RMK) |
| Hold BOOT while plugging in, or hold BOOT and press reset | RP2040 controllers |
| Press reset once | Most ATmega32U4 / STM32 controllers |
| Hold the top-left key while plugging in (Bootmagic) | QMK keyboards with Bootmagic |
| A bootloader key in the keymap | QMK QK_BOOT, ZMK &bootloader |
Step 2: flash
Option A: drag to the drive (.uf2)
ZMK, RMK, and QMK on RP2040 all use this — the simplest way:
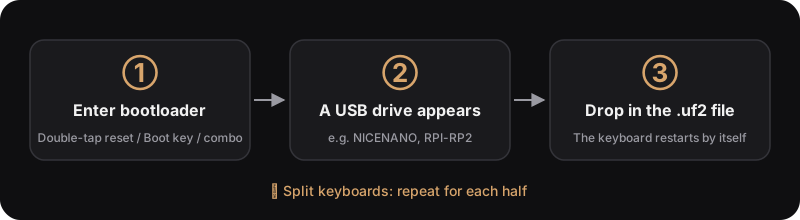
- In bootloader mode a USB drive appears, e.g.
NICENANOorRPI-RP2. - Drag the
.uf2file onto it. - When copying finishes, the keyboard restarts by itself and the drive disappears.
Option B: QMK Toolbox (.hex / .bin)
For QMK keyboards on ATmega32U4, STM32 and similar:
- Install QMK Toolbox (Windows / macOS).
- Click Open and choose the firmware (
.hexor.bin). - Put the keyboard in bootloader mode; Toolbox reports the device (yellow text).
- Click Flash and wait for it to finish.
Or from the command line: qmk flash -kb <keyboard> -km <keymap>.
Split keyboards
If wireless halves won't connect after flashing, see "Re-pair split halves" in Bluetooth pairing.
Flashed the wrong file?
Don't panic: as long as you can enter the bootloader, you can flash the right firmware again. If you can't, contact the keyboard's maker.